Soil Moisture Meters for CEA: A TDR vs. Capacitance Analysis
If you want to get irrigation right in Controlled Environment Agriculture (CEA), you have to stop eyeballing it and start making decisions based on data. That’s where soil moisture meters come in, they give you real numbers about the water available to your plants.
But here’s the first thing to understand: these sensors don’t actually measure water. They’re using a clever electrical trick based on something called dielectric permittivity.
Think of it like this: the three things in your substrate – water, the solid particles (like coco or peat), and air, all react differently to an electric field. Water has a high dielectric constant of about 80. The substrate itself is super low, somewhere between 3 and 7, and air is basically 1. Because the value for water is so dramatically different, the sensor can get a really clear picture of how much water is in the mix just by measuring the overall electrical property. As the water goes up, the permittivity reading goes up. It’s a predictable relationship that lets the sensor translate an electrical reading into a water content measurement.
What is VWC, Really?
The number you see on your screen is Volumetric Water Content (VWC). It’s just the volume of water in a given volume of substrate, shown as a percentage. So, if a 1-liter pot of coir has 0.45 liters of water in it, the VWC is 45%. In the contained world of CEA, VWC is the number that matters most for steering your crop.
Too many growers treat their sensors like a black box, though. They see “45% VWC” and just take it as fact. This is a mistake, because it can lead to all sorts of problems when you’re trying to figure out why your readings look off. The sensor isn’t just seeing the water content; it’s doing a two-step dance. First, it measures the dielectric permittivity. Second, it uses a math formula – a calibration equation – to convert that reading into a VWC number.
This is a critical distinction. When you see a VWC reading that doesn’t make sense, your first instinct might be to blame the sensor. But more often than not, the sensor is doing its job just fine. The real problem is that the calibration equation being used is a poor fit for your specific substrate, nutrient mix, and temperature. So, the question you should be asking isn’t “Is my sensor broken?” but “Is my calibration right?”.
The Two Main Players: TDR vs. Capacitance Soil Moisture Meters
When it comes to measuring permittivity in CEA, you’re basically looking at two types of technology: Time Domain Reflectometry (TDR sensor) and Capacitance (often called FDR). They both get you to a VWC reading, but they get there in very different ways, with different costs and trade-offs.
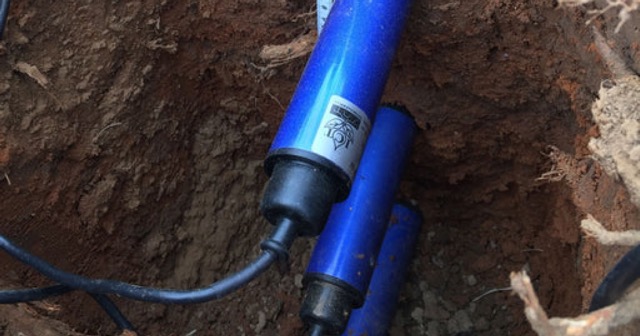
Time Domain Reflectometry (TDR Sensor): The Gold Standard
TDR sensor is the high-end option. They work like radar, sending a super-fast electromagnetic pulse down a pair of metal rods stuck in the substrate. The sensor’s brain then measures exactly how long it takes for that pulse to travel down the rods and bounce back. The more water in the substrate, the slower the pulse travels.
- The Good: TDR sensor is considered the most accurate and reliable method out there. Because it’s a time-based measurement, it’s not easily thrown off by other factors. A huge advantage is that it’s not very sensitive to salinity (EC). In a fertigation system where your nutrient levels are always changing, this is a massive plus.
- The Bad: The biggest drawback is the price tag. The fancy electronics needed to time those pulses down to the picosecond make TDR sensors expensive, we’re talking over $300 for a single sensor. They also use more power, which can be a concern for large wireless networks.
Capacitance / Frequency Domain Reflectometry Soil Moisture Meters (FDR): The Workhorse
Capacitance soil moisture meters are the more common and affordable choice. They work by creating an electrical field between two electrodes. The substrate acts as the material in a capacitor, and the sensor measures how much charge can be stored, which is directly related to the water content.
- The Good: They are much, much cheaper, which means you can afford to put more of them in your grow. They also use very little power, making them perfect for battery-operated wireless setups.
- The Bad: Here’s the catch: capacitance sensors are extremely sensitive to both salinity (EC) and temperature. They operate at a lower frequency than TDR sensor, and at that frequency, changes in nutrient concentration or temperature can look like a change in water content, leading to some serious errors if you’re not careful. This also means that substrate-specific calibration isn’t just recommended; it’s absolutely essential. They’re also very picky about installation – any air gaps around the probes will give you falsely low readings.
Additional Sources:
- Comparison of the soil moisture meters for home growers – The Best Soil Moisture Meters
- How soil moisture meters work – https://metergroup.com/measurement-insights/soil-moisture-sensors-how-they-work-why-some-are-not-research-grade/
Choosing between TDR sensor and capacitance isn’t just a technical choice; it’s a business one. It’s about paying more upfront (CapEx) versus paying more in ongoing labor (OpEx). TDR sensor is a high-CapEx move. You spend a lot on the hardware to get reliable data and spend less time and money later on recalibrating, double-checking readings, and troubleshooting weird data caused by EC swings. Capacitance sensors are the low-CapEx route. You save money on the sensors, but you have to commit to the ongoing work of meticulous calibration and maintenance. If you skip that work, you risk getting bad data, which defeats the whole purpose.
| Parameter | Time Domain Reflectometry (TDR) | Capacitance / FDR |
| How it Works | Measures the travel time of a high-frequency pulse. | Measures the charge stored in a capacitor. |
| Accuracy | Very high, the “gold standard.” | High if you do a substrate-specific calibration. |
| Cost | High (often $300+ per sensor). | Low to Moderate ($30 – $300 per sensor). |
| Power Use | High. | Low, great for wireless setups. |
| Sensitivity to EC | Low. Largely immune to it. | High. This is its main weakness. |
| Sensitivity to Temp | Low to moderate. | High. Can cause readings to drift. |
| Installation Sensitivity | Moderate. | Very High. Air gaps are a killer. |
| Best For… | High-value crops where accuracy is everything; research; grows with big EC swings. | Large-scale grows where you need a lot of sensors and have a solid calibration plan. |
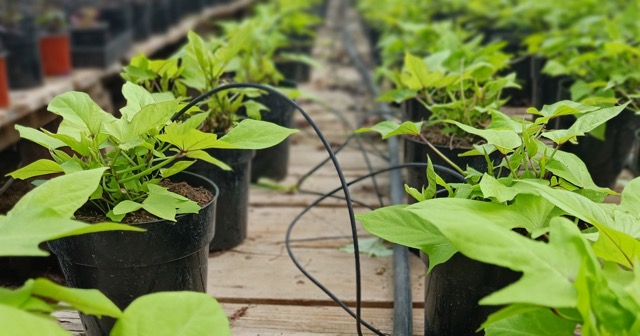
The Substrate – Soil Moisture Meters Connection
You can’t think about soil moisture meters without thinking about your growing medium. Your choice of substrate has a huge impact on which sensor technology will actually work for you.
Rockwool: This stuff is uniform and holds water well, but it has a tiny buffer zone. It can go from wet to bone-dry in a flash, so you need sensors to stay on top of it. Because it’s so uniform, it’s a pretty good medium for either TDR or capacitance sensors. The main thing to watch for is water stratification, the bottom of the slab will be much wetter than the top, so you have to be smart about where you place your sensor.
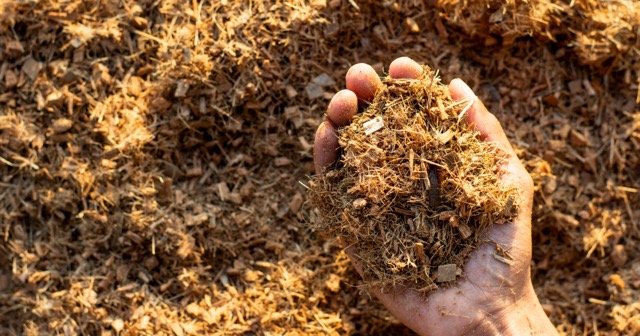
Coco Coir: Coir is great because it holds a lot of water and has a bigger buffer than rockwool. But for sensors, it’s a nightmare, especially for capacitance types. Because it’s organic and tends to hold onto salts, it can amplify all the EC and temperature sensitivity issues. Some research even suggests that the ideal measurement frequency for coir lines up perfectly with TDR, but not with most capacitance sensors. It’s a tough medium for anything but TDR.
Peat-Based Mixes: Peat is super absorbent, but it can become hydrophobic (water-repellent) if you let it dry out too much. Like coir, its organic nature makes it tricky for capacitance sensors. The hydrophobicity adds another wrinkle: a sensor might read “dry” just because the water isn’t making good contact with the probes, not because the slab is actually out of water.
The bottom line is this: your substrate choice limits your sensor options. If you choose coco coir, you’re setting yourself up for a challenge if you then try to use cheap capacitance sensors without a rock-solid calibration plan. You have to think of the substrate and sensor as a single, integrated system.
Why You Can’t Skip Substrate-Specific Soil Moisture Meters Calibration
I’m going to say it again: calibration is the most important step for getting good data. The generic “soilless mix” setting that comes from the factory is not good enough. It can’t possibly account for your specific substrate density, temperature, and nutrient solution. Using it will almost certainly lead to you over- or under-watering your crop.
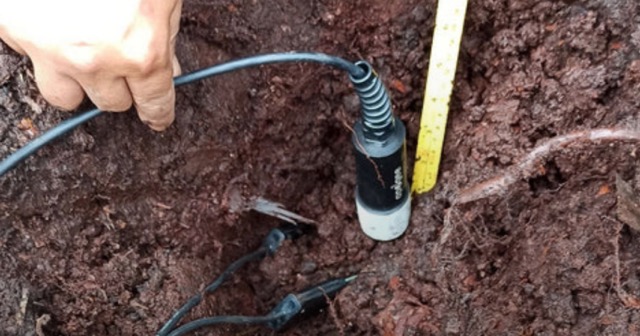
The Gravimetric Method: How to Do It Right
The gold standard for calibration is the gravimetric method. It sounds intimidating, but it’s just a process of matching your sensor’s raw output to the true VWC, which you find by weighing and drying samples.
A Quick-and-Dirty Protocol for Growers:
- Get a sample of your exact, unused substrate and dry it completely in an oven. For coir or peat, use a low temp (60–70 °C) so you don’t burn it.
- Take your dry reading. Pack the dry substrate in a container, insert your sensor, and record the raw output. That’s your 0% VWC.
- Start adding water. Add a little bit of your nutrient solution at a time, mixing it in thoroughly.
- Measure and sample. At each new moisture level, take a sensor reading and immediately take a small sample in a container of a known volume. Weigh the wet sample, then dry it in the oven and weigh it again.
- Do the math. Use the weights to calculate the true VWC for each sample.
- Build your curve. Plot the sensor’s raw readings against your calculated true VWC values. The equation for the line that fits those points is your custom calibration.
It’s a lot of work, but even a simple two-point calibration (one at oven-dry and one at field capacity) is a world better than the factory settings. And remember, calibration isn’t a one-time thing. As roots grow and the substrate compacts, your calibration will “drift.” You need to have a process for checking it periodically. A simple way is to just weigh a control slab every now and then and see if the weight loss matches what the sensor is telling you. If it doesn’t, it’s time to recalibrate.
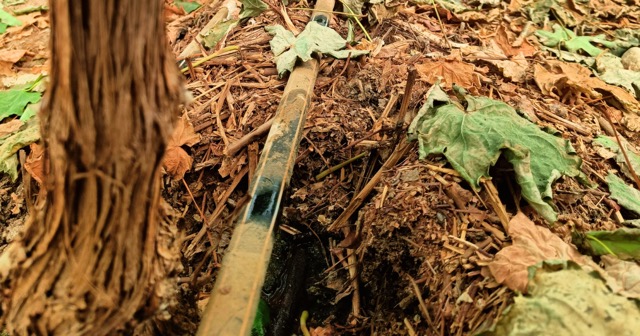
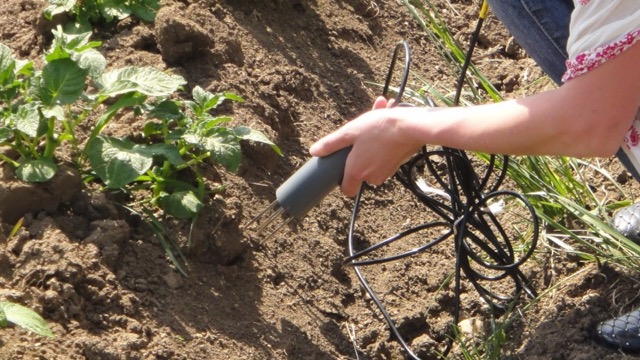
TDR Sensor Field Guide: Installation, Placement, and Maintenance
A great TDR sensor in the wrong spot is a useless sensor. Here’s how to deploy them correctly.
- Good Contact is Everything: This is rule number one. Air gaps will kill your accuracy. Insert the sensor with a firm, straight push. No wiggling.
- Placement is Key:
- Depth: Go for the middle third of the slab’s height. This avoids the crusty top layer and the swampy bottom.
- Angle: In rockwool, a 45-degree downward angle often works well to get the prongs into the main root mass.
- Distance from Drippers: Never put a sensor right under a dripper. You’ll just measure a constant wet spot. Start about 4-6 inches away and adjust until you see a clear dry-back curve in your data.
- Distance from Plant: The sweet spot is usually halfway between the plant stalk and the edge of the bag.
- How Many Soil Moisture Meters? For most grows, 2 to 4 sensors in representative spots is a good start. In bigger facilities, spread them out across your irrigation zones, especially in spots that you know have microclimates.
- Maintenance is Simple but Crucial:
- Clean the Probes: Fertilizer salts will build up on the probes and throw off your readings. Wipe them down with a soft cloth and distilled water once a week.
- Audit Your Data: Always ask yourself if the data makes sense. Does the dry-back match the weather? If something looks weird, it probably is. Go check it out.
Best Soil Moisture Sensor – https://growdirector.com/shop/soil-moisture/
The biggest threat to good data isn’t the tech; it’s people. If different employees are all installing sensors in slightly different ways, your data will be a mess. You need a Standard Operating Procedure (SOP) that spells out exactly how and where to install soil moisture sensors. Mark the spot on the grow bag. Train everyone to do it the exact same way, every time.
The Next Level: Crop Steering with VWC and EC
Once you have reliable data, you can move beyond just keeping your plants alive and start actively steering their growth. This is called crop steering, and it’s all about using irrigation to push the plant between a vegetative state (growing leaves and stems) and a generative state (making flowers and fruit).
The two main levers you have are the VWC dry-back and the root zone EC.
- VWC Dry-Back: This is how much you let the VWC drop overnight.
- For Vegetative Steering: You want small dry-backs (6-12% VWC). This means smaller, more frequent waterings. The plant stays happy and focuses on growth.
- For Generative Steering: You want to introduce a little stress with bigger dry-backs (12-20% VWC or more). This means larger, less frequent waterings, and cutting off irrigation a few hours before lights out. This stress tells the plant to focus on reproduction.
- Electrical Conductivity (EC): The dry-back also controls your root zone EC. As the substrate dries, the nutrient salts get more concentrated, which raises the EC. This makes it harder for the plant to take up water, another form of generative stress. Frequent waterings keep EC low and stable (vegetative), while big dry-backs cause EC to spike (generative).
Crop steering is a dynamic game. You’ll steer a tomato plant vegetatively to build a big frame, then switch to generative steering to get it to set fruit. You can’t do this by looking at VWC alone; you have to look at your climate data too, especially Vapor Pressure Deficit (VPD), to get the full picture.
Tying It All Together: System Integration
Soil Moisture Meters are just one part of the system. They need to be connected to a data and control platform to be truly useful. Most good sensors use a standard protocol like SDI-12, so they can plug into a wide range of data loggers and greenhouse automation systems.
Companies like GrowDirector, AROYA, and Pulse offer complete platforms that pair sensors with powerful software for visualizing data and automating your irrigation. These systems are what turn raw numbers into smart decisions.
The future is heading toward real-time mapping. By using dense networks of wireless soil moisture meters, you can create live maps of the VWC and EC across your entire facility. This lets you spot problems like clogged drippers or salt buildup before they become disasters. This is the kind of data that AI and machine learning can really sink their teeth into, making predictive irrigation decisions on a per-plant basis. That’s the ultimate goal: turning the root zone from a black box into a completely transparent, perfectly managed environment.