How easy is the GrowDirector usage and installation?
GrowDirector software is an automated solution for every type of growing environment, such as a grow room or a greenhouse. It is a one-stop, plug, and play solution for the entire grow room operation and procedure. It is the all-in-one controller that could support your plant’s growing needs. GrowDirector designs in a way that could ensure an intuitive, smooth, and easy operation of your grow room. GrowDirector controller is adjustable as well as modularly inbuilt, allowing it to be the customized nominal key for any indoor garden operations. The technology used is the IoT, (Internet of things), which aids in automating plant cultivation conditions with zero mistakes and corrective measures.
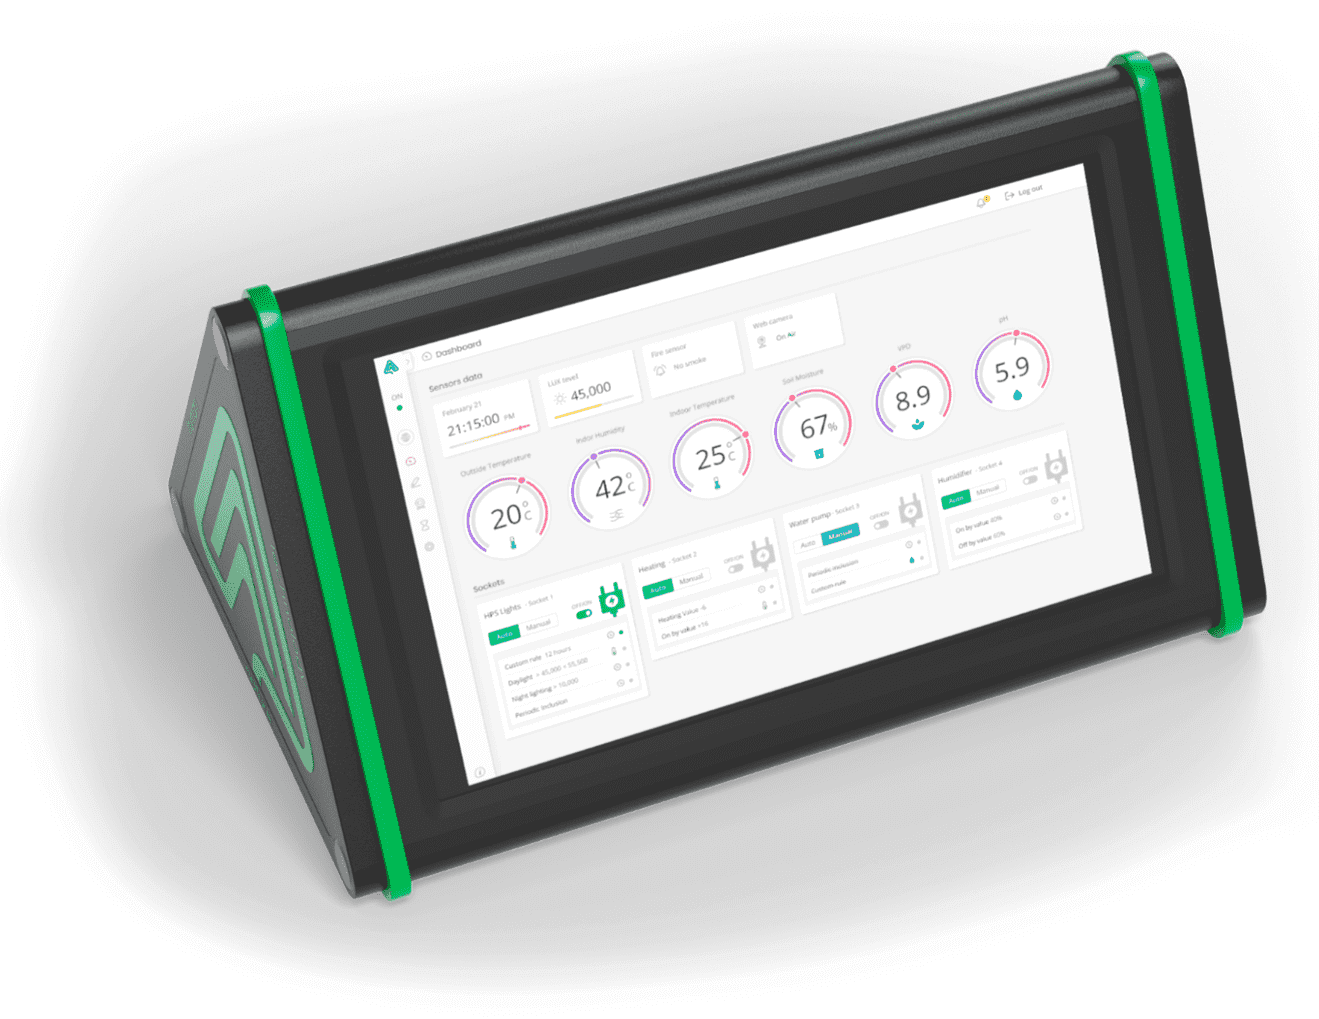
GrowDirector is a simple controller that comes with a built-in HMI (Human Machine Interface). For its operations, it needs to be first powered up with the given power-cord and turned on from the manual switch present at the back. The GrowDirector comes with 8-inputs for sensors and 10-build-in relays.

One Controller For All Your Growing Needs.
Once the device is powered ON, it asks for the preferred language, it comes with many built-in languages. This device configures via an onboard 10” display, web, or mobile app. The GrowDirector asks you to make an account on it that operates on the Wi-Fi option, making it a secure connection. In case for offline, local use only, GrowDirector comes with an incognito mode, but with this option, the configuration of the mobile app is not possible. Otherwise, the remote-control options will be disabled the device is still working perfectly fine. Because the user decided to go into incognito mode the device will never go online so nobody can detect the user.
The sensors and the socket option go hand in hand with each other. Initially, a sensor needs to connect to any of the 8 pins inputs. Then on the “Setup Sensor Screen.” the user will add: sensor name, description, and type. A sensor might come with two different functions. For example, a temperature and humidity sensor combined in this case, dual-sensor types are selected for taking up two different sets of readings.

For the socket options, the outputs must attach through a 6-pin plug. A total number of two 6-pin plugs get attached to give a total of 8 output sockets which can be controlled independently. The equipment, such as motors or window operators, etc., is plugged in the universal sockets. On the HMI, the left-most column shows the 4-sockets attached with pin 1, and the second left column shows the 4-sockets attached with pin 2. Similarly, the 10-relays show on the rightmost side of the HMI.

Connecting the socket box
Now let’s go towards the inputs and output configuration with the GrowDirector device. The configuring is necessary for the device to uptake the data automatically and operate the desired rule for the smooth provision of all your growing needs. For the inputs, the PIN, in which the sensor gets attach, be added with the sensor type and description. If the sensor provides the dual-type of readings, then the duality option is selected to uptake both natures of reading.

output configuration
For the socket options, the outputs must attach through a 6-pin plug. A total number of two 6-pin plugs get attached to give a total of 8 output sockets which can be controlled independently. The equipment, such as motors or window operators, etc., is plugged in the universal sockets. On the HMI, the left-most column shows the 4-sockets attached with pin 1, and the second left column shows the 4-sockets attached with pin 2. Similarly, the 10-relays show on the rightmost side of the HMI.

This configuration helps the sensors and equipment to communicate
After the configuration, the next step is the application of a rule. This configuration helps the sensors and equipment to communicate with the GrowDirector. But what is the use of such communication if, doesn’t implement actively? The rules are the basic commands that allow an action, provided that the following sets of values get accepted and appear on the sensors. The Rules connect the inputs (sensors) with the outputs (equipment). The rules can be configured depending upon different conditions, parameters, time, values (sensor reading), or any two situations combined. For creating a rule, a user must go to the rule option from the main menu (left side of the screen) and touch the “plus” button for adding a new rule. Enter the name and specify the conditions or ranges that need implementing for the rule. Sometimes two different rules are configured for implementing on one socket as well, which showed us the “duplicate socket”.

Rules screen
A simple example of the rule is shown above, in this rule, every day, at 6:00 P.M from 11/03/2017 onwards, the value of the soil moisture checking appears. If the value is near 20, the irrigation gets turned on for 25 minutes, and then the sensor value is checked again. If after 20 min the soil moisture sensor is giving a value near 60, then the irrigation will get turned off. If not, the process will get repeated unless the desired result is achieved. Upon assigning a rule, one must keep in mind that the whole system should be set on auto for this automatic procedure to take place.
One of the best features of GrowDirector is its mobile application. This greenhouse control system helps in getting real-time information from all the sensors of your greenhouse on your mobile display. It tells which socket is now in operation and what led to this operation. The rules and conditions are easily editable. If a camera gets installed in the greenhouse, the live streaming of your plants could help you to monitor the growth and automate growing conditions remotely.
Other than this, the GrowDirector also has a unique tool function that can either help you configure the units in which the whole measurement takes place or the creation of custom models for the implementation of rules. For rules related to EC and pH sensors, there is a recommended relaxation time option as well. As we all know, that pH and EC do not change instantly upon dosing of the desired product in it. Moreover, this instant change is also not recommended and is not safe for the plant’s health. For this, the rules get set in a way that they first check the pH or EC and start the dosing operation and then wait and let it settle for a few minutes. After some time, let’s say 30-45min, the sensor again takes the reading and decides to repeat or stop the dosing process completely.